 |
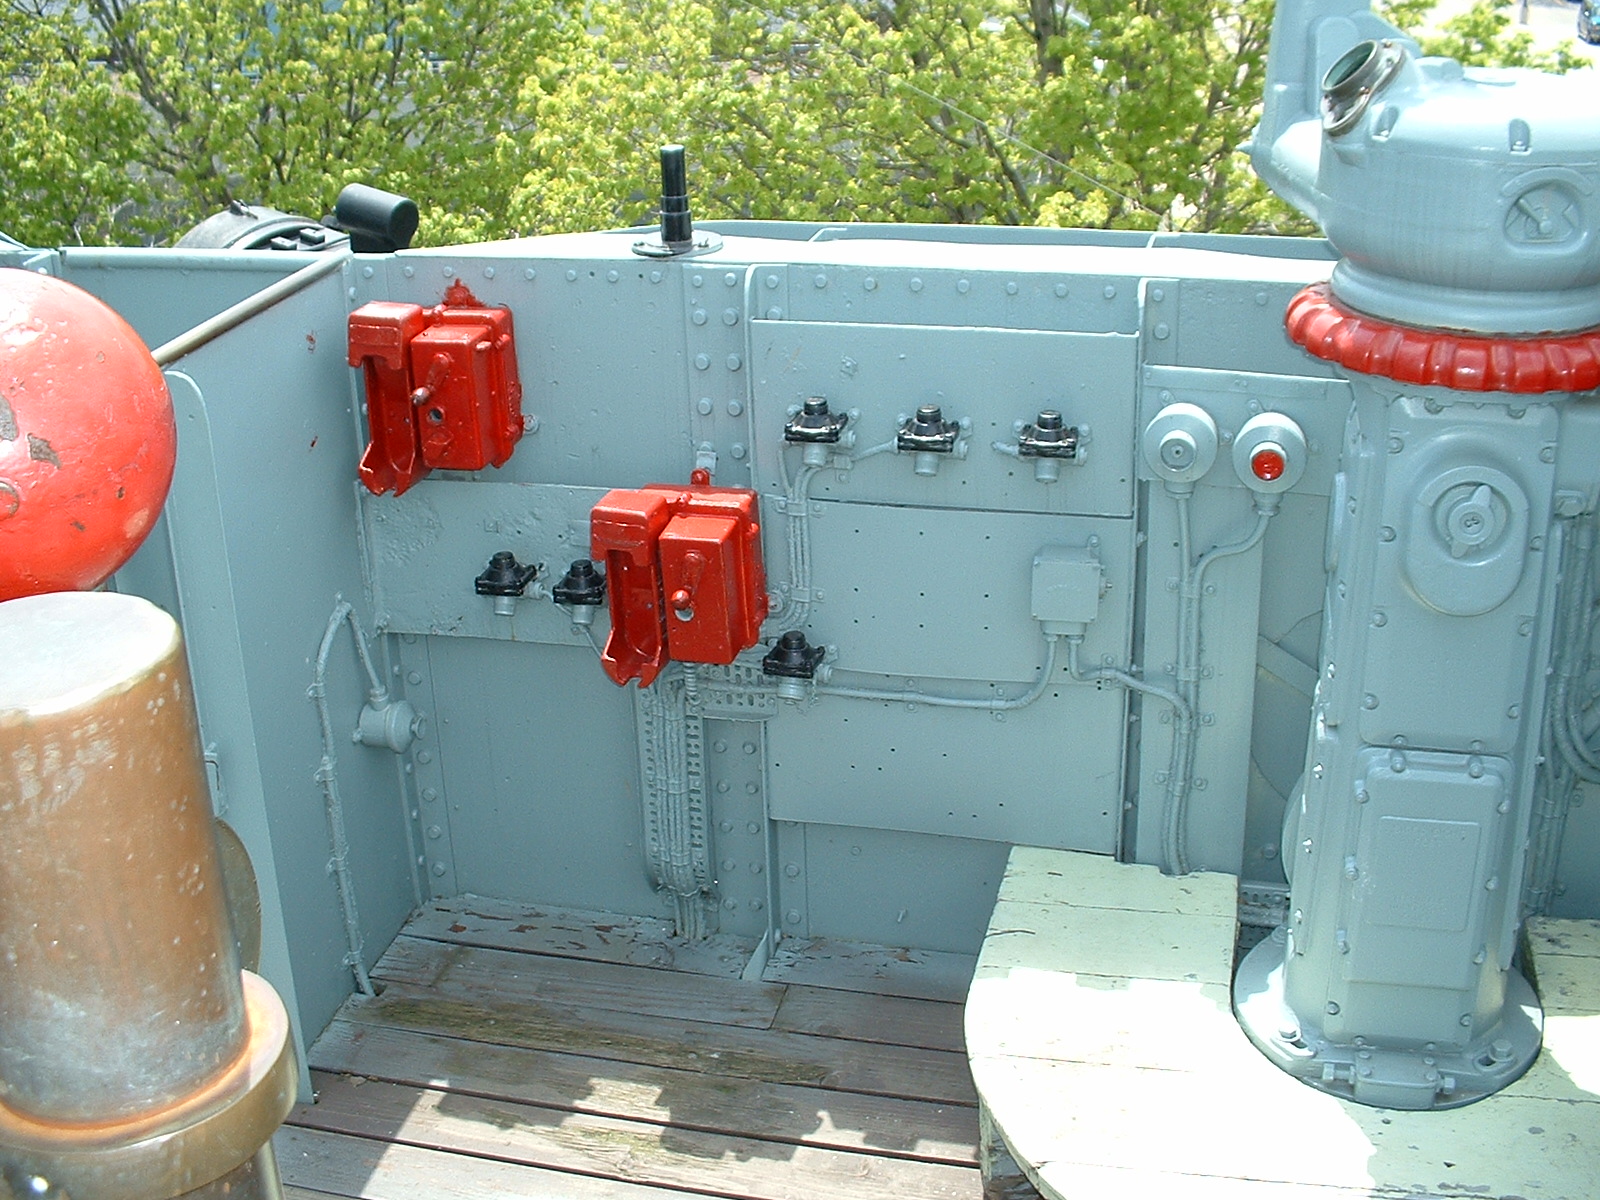
| Command, Control and Communications are the three words which best describe the basic functions of the bridge. Every activity aboard the ship came under the "command" of the bridge. Command was exercised by the Captain, either personally or through the Officer of the Watch. This is the color scheme of the bridge during the Korean war era. (Photo by Jerry Proc) |
 |
| In the 1960s, the RCN started painting open bridges in this light fern green colour since this shade is very easy on the eyes. When HAIDA completed her 2002-3 refit, the paint scheme reverted to that in the above photo. In this photo, the binnacle has been removed for maintenance. (Photo by Jerry Proc) |
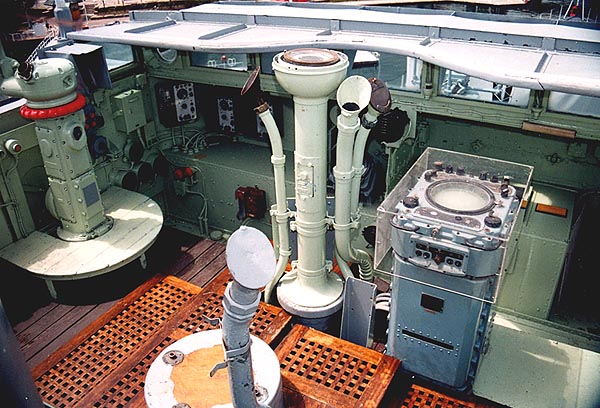
HAIDA has an open bridge. When Tribals were designed in the late 1930's, all target sightings were visual in nature so it was imperative that all eyes had an unobstructed, 360 degree view of the horizon. In post war designs, as more and more electronics made its way to the bridge, it became a necessity to cover the bridge simply to protect the equipment. The additional climate comfort realized by the crew was simply a consequence of protecting the equipment. One can only imagine what is must have been like to stand watch on HAIDA's bridge during inclement weather conditions in the North Atlantic or on the Murmansk run through the Arctic Ocean.Because it is painted over, there is one major point aabout the bridge that most are not aware of. To reduce the effects of stray magnetism on the wet compass, parts of the bridge and wheelhouse are fabricated with brass plate. The brass plate starts just aft of the ladder and continues forward to front of the bridge and includes the deck and bulkheads of the Wheelhoude House.
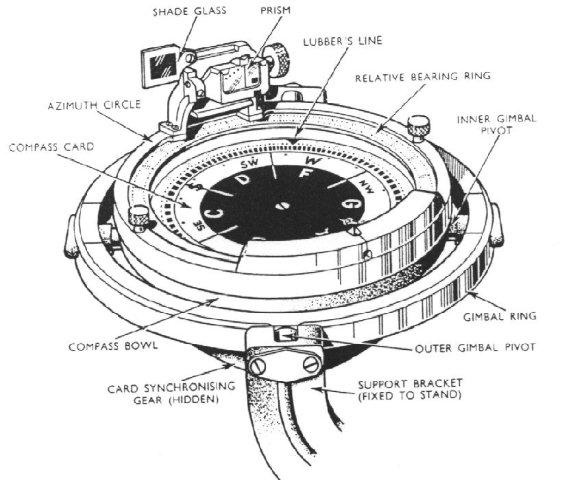
In the binnacle, there are lots of magnets that help to correct the readings plus a variation chart for each compass . A chart would be kept on the bridge in case they had to steer by magnetic compass alone. The binnacle compass would be calibrated on a range in Bedford Basin in a process called "swingimg the compass". The ship would be positioned on known headings and then the magnets were adjusted so the wet compass produced a true reading.
The widow on the bridge which looks down into the wheel house was put in when HAIDA was in Toronto and prior to 1992. The original bridge plot table able which previously occupied this space is stored in the A gun support unless its been moved.
 |
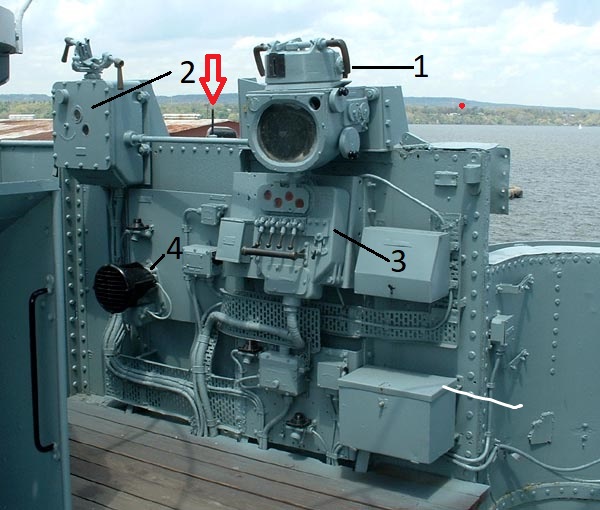
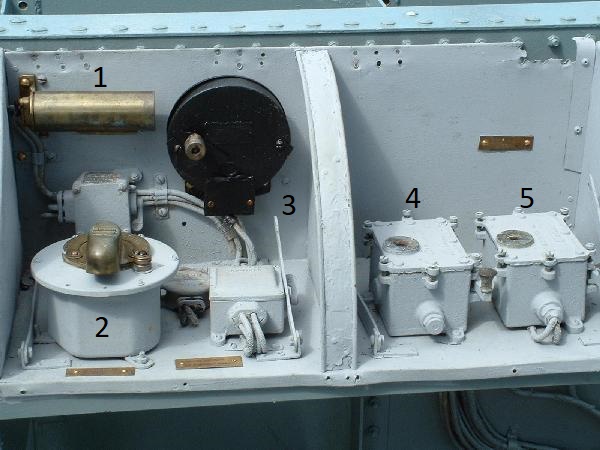
| 1) Target Designation
Sight. For azimuth, the red ring rotates the entire sight. There is also
a crank for elevation. A pair of binoculars (missing) was fitted to the
top arm which is just outside the view of the photo.
There is an identical unit on the starboard side.
Use: For visual acquisition of targets. 2) IC-KAA intercom.
3) Remote Control for CM11 transmitter/receiver. but its not connected to any CM11. this was an abandoned project of the Nortown Radio Club circa 1985. HAIDA never had a CM11 remote control on the bridge. 4) Remote Control Unit- 1 of 3
5) Pelorus
6) Torpedo Bearing Indicator. Its hidden and ahead of the Pelorus in this view. Its face is marked with the words "RED" and "GREEN". To the top and slightly to the left of the bearing indicator are the sonar dome "Up/Down" indicator lights. 7) AN/SPA-4 radar repeater.
8) Wheelhouse viewing window.
9) AN/SPA-4 input selector switch.
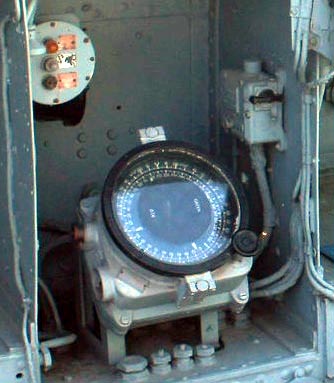
10) Magnetic compass in binnacle but the
binnacle is missing
11) Voice Pipes (1 of 4)
|
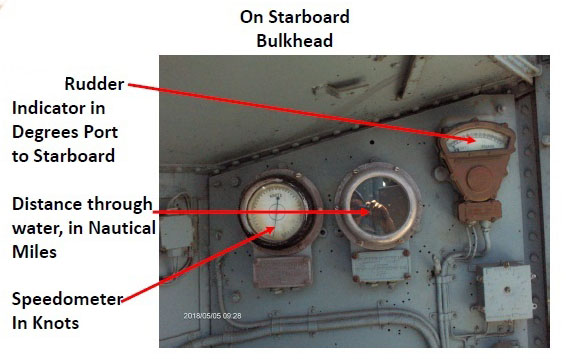 |
| Bridge instruments |
 |
| Remote Torpedo Firing Station: (Starboard side) No 1
is the Torpedo Aiming Sight It is mechanically connected to the No, 2 box
which is a Target Designation sight . The torpedo tubes would
be trained so so that they pointed outward and 90 degrees to the deck.
To aim the torpedo itself, the ship had to be turned The #2
box had binoculars atop. The No 1 box had a firing rake (aiming sight)
on it but it is missing at this time. #3 are the four
Firing Switches for the torpedoes. The torpedoes could be fired locally
in case the bridge was put out of action. This firing station was duplicated
on the port side. No. 4 is a Loud Hailer.
On HAIDAs bridge, there was a nondescript metal rod welded to the superstructure (starboard side) as denoted by the red arrow. It was about 4 inches high, ¼ in in diameter with a chisel tip. According to Bob Welland, Haida's second captain, the rod was used to hang a clipboard on. Additionally, there was a firing rake under the dome at the local operator's position on the torpedo tubes. |
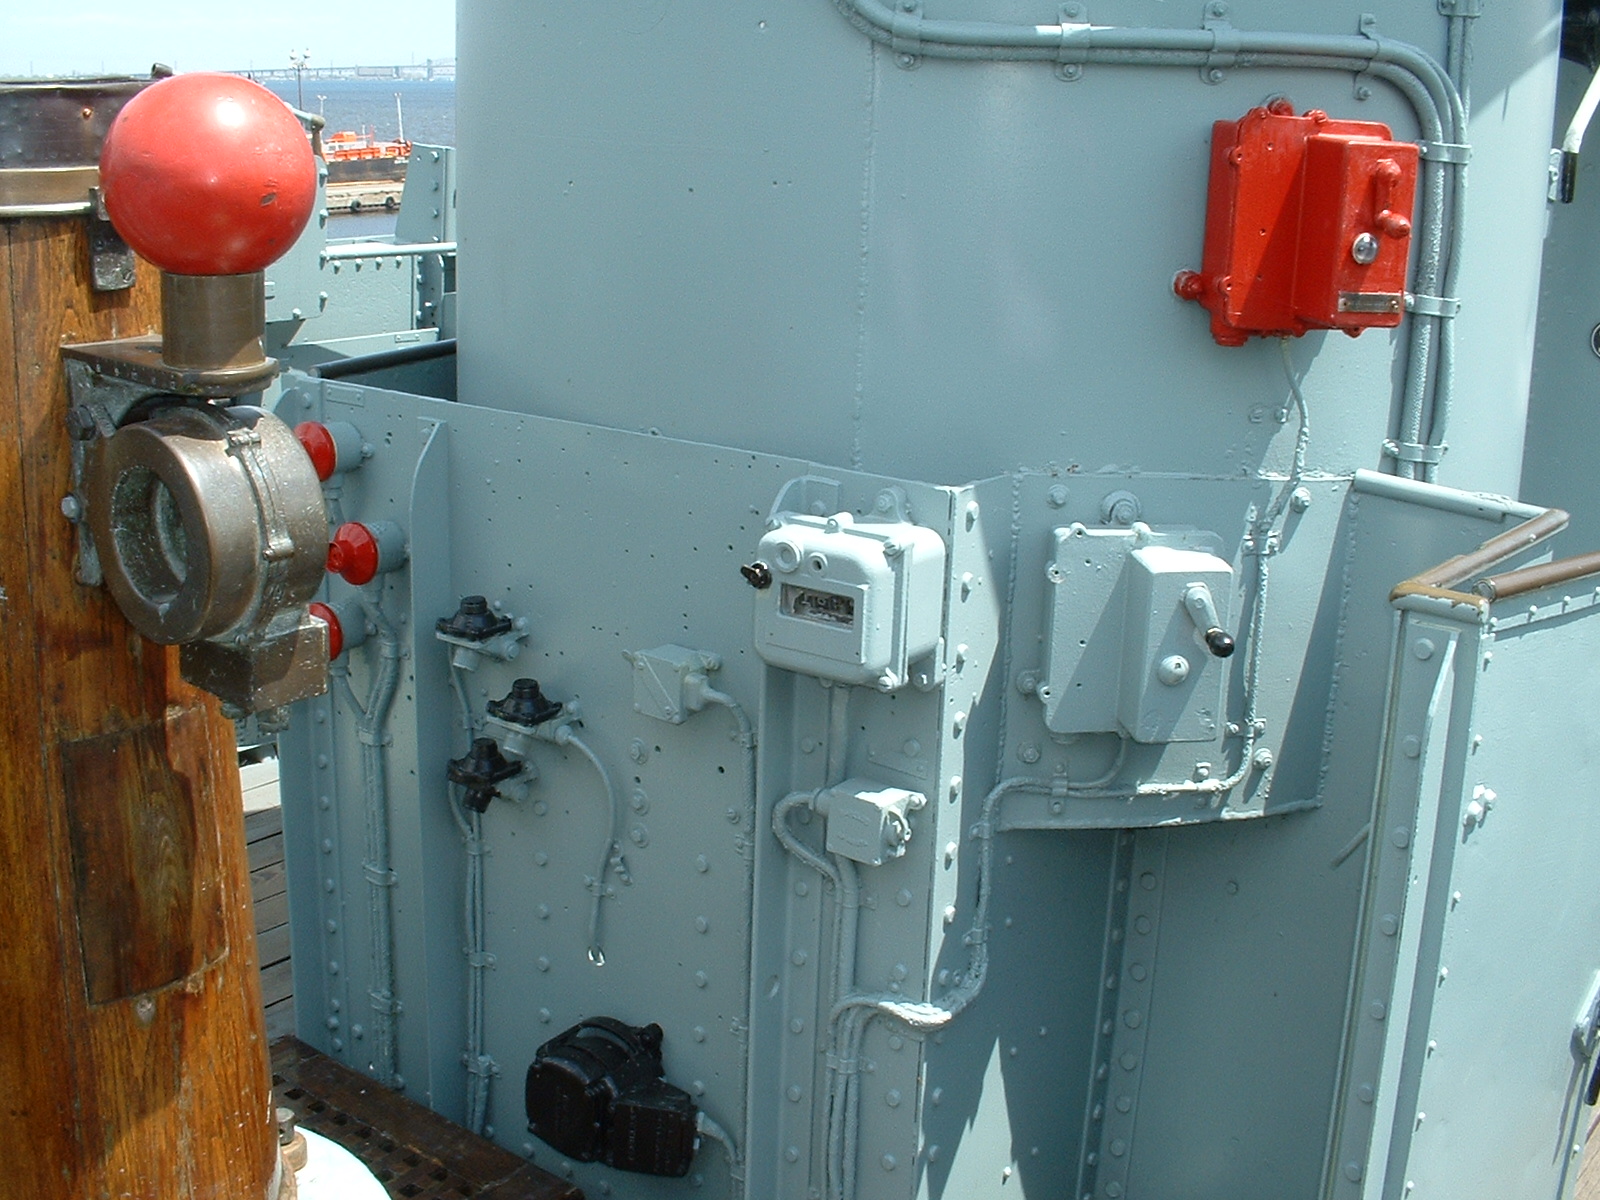 |
| After end of the bridge. The red, sound powered telephone, connects to the Damage Control Office. |
 |
| Port Aft end of the bridge. The black boxes are actually jacks for point to point communications using sound powered hand sets. Both handsets had to be plugged into the the particular circuit being used. These jacks were typically used by maintenance personnel where the frequency of use could not justify the installation of a sound powered telephone. An example of this might be someone working on the yardarm who wants to talk with a person on the bridge. |
 |
| This is a Signalling station for the various signalling lights,
When not in use, this station would be protected from the elements by a
metal cover. A signalling station was fitted to each side of the bridge.
1) Illumination lamp.
|
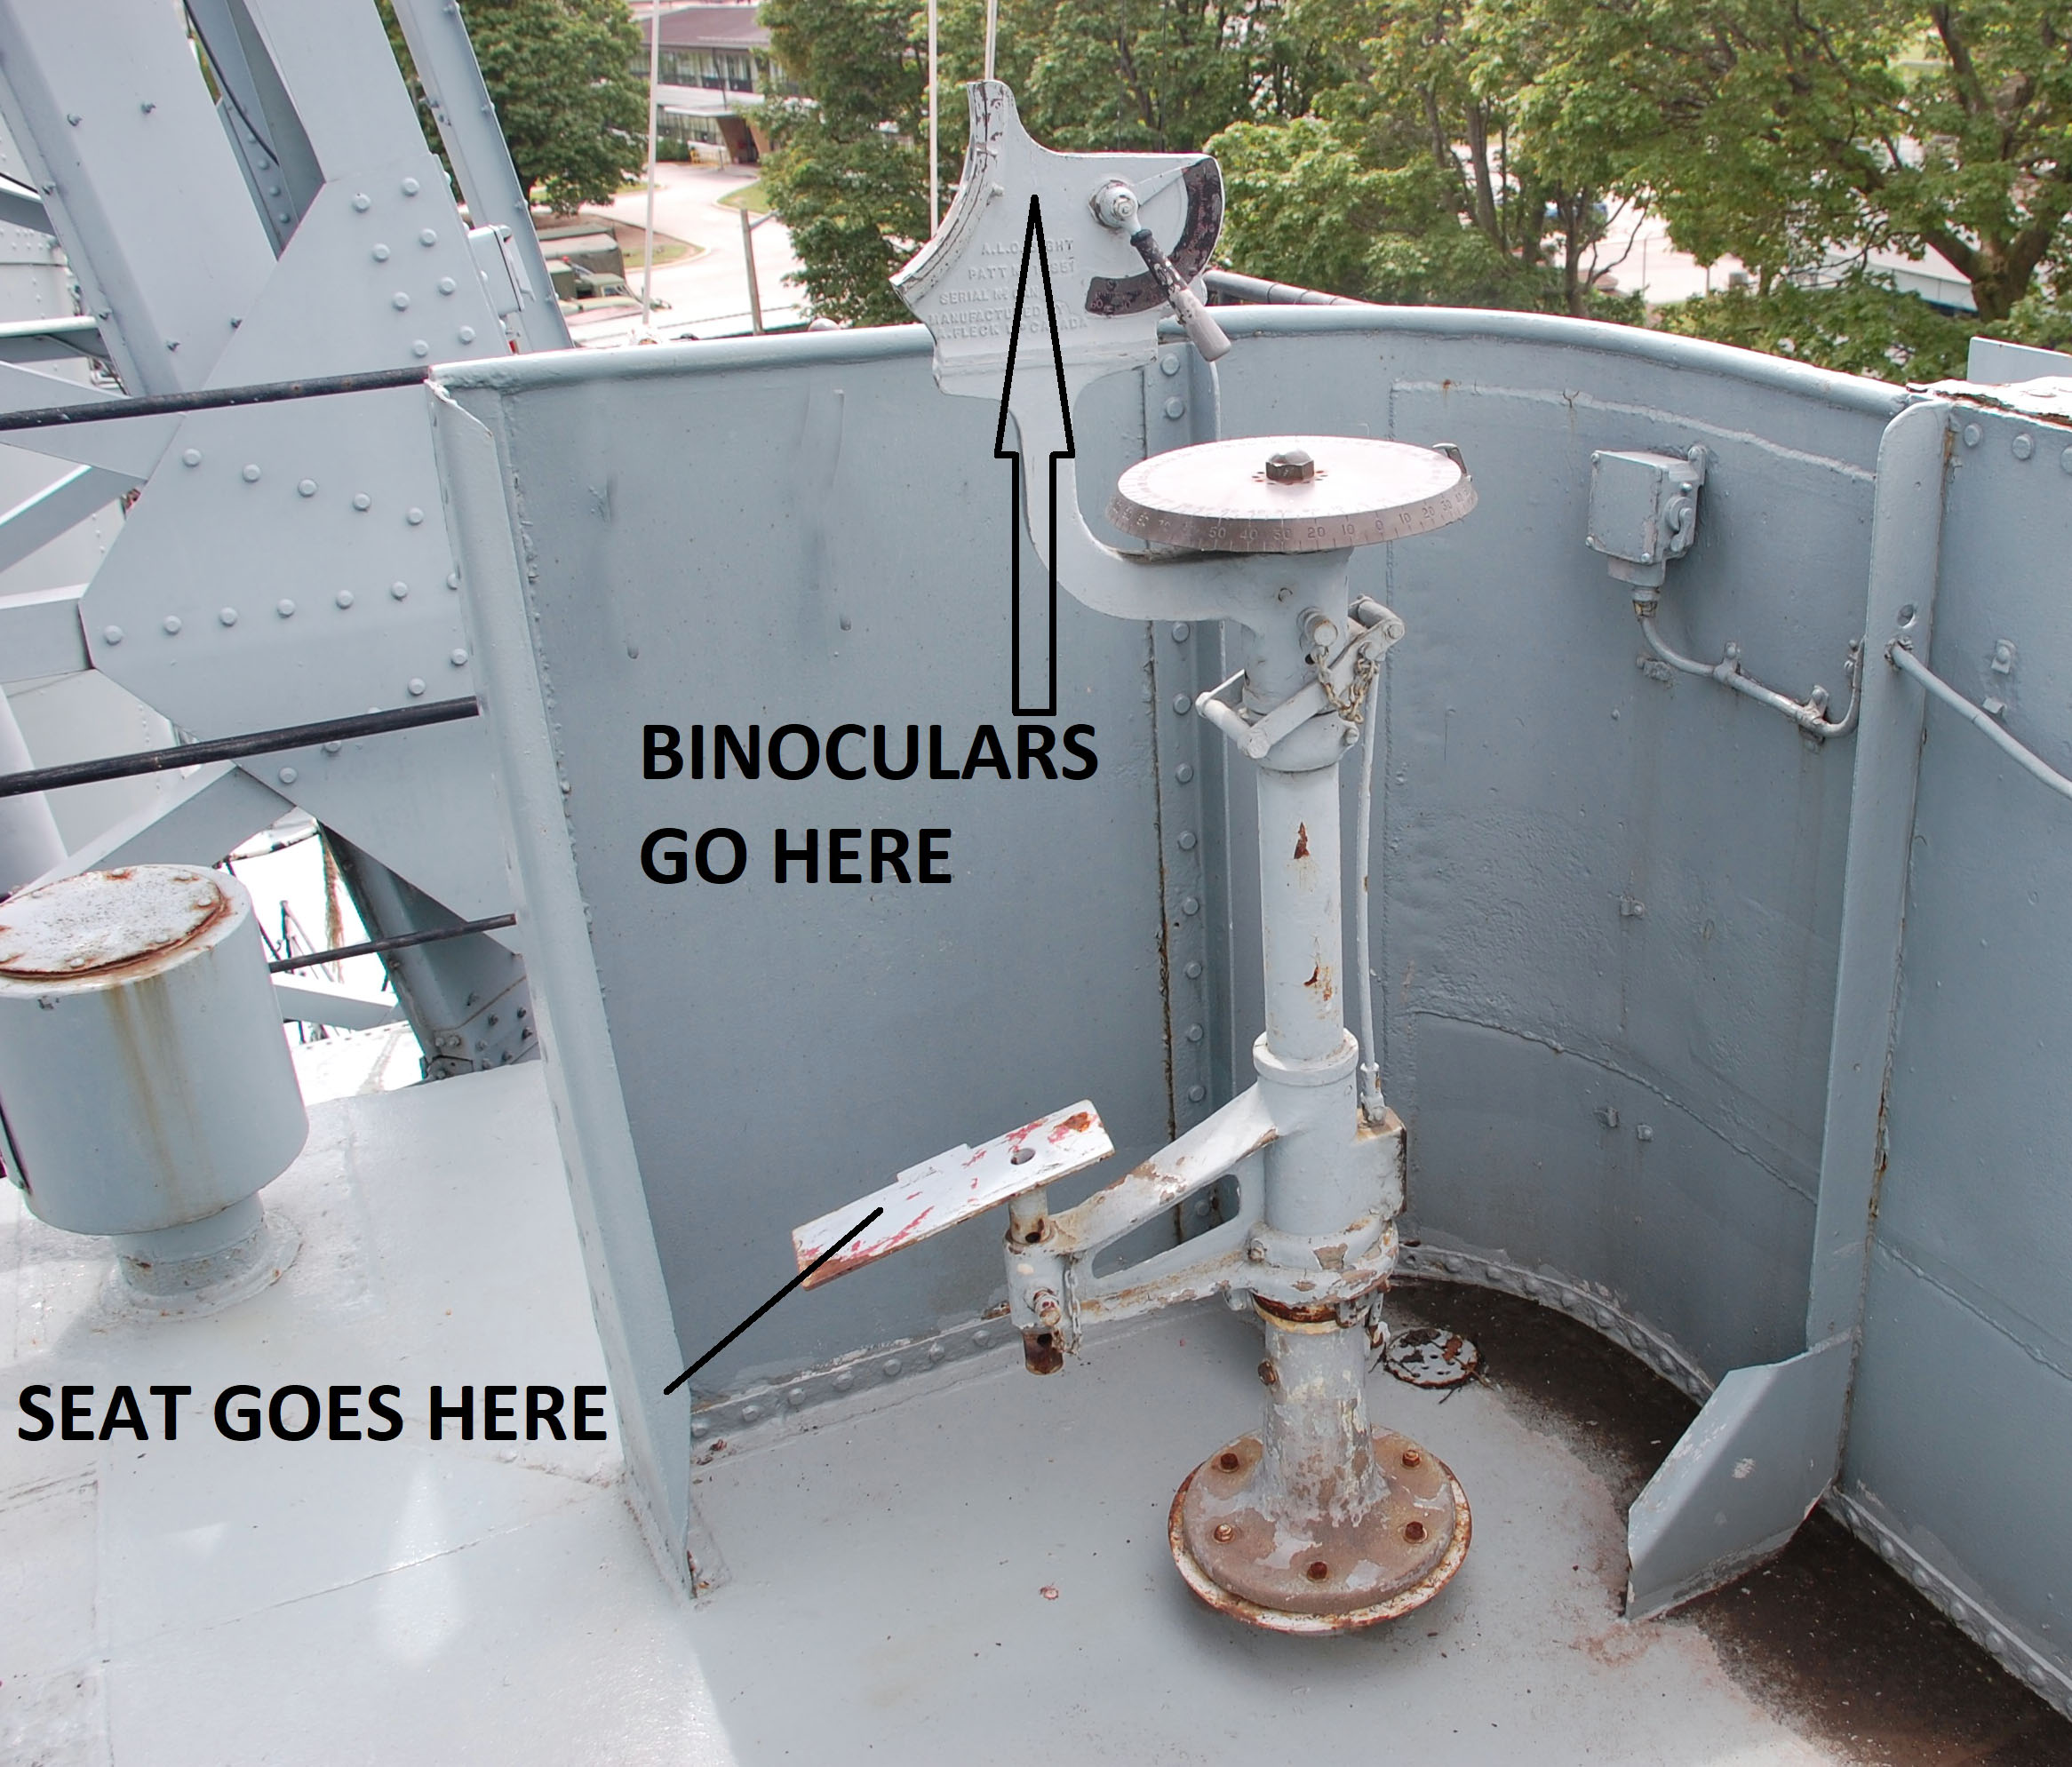 |
| The bridge had four lookout positions, Each lookout was assigned
to scan a different 90 degree arc of sea or sky. Elevation and bearing
could be read from a scale once the target was acquired. A handle
controlled the elevation. Because the seat and binoculars are missing it
is had to tell the purpose of this device without some help.
Once the target was acquired visually, the bearing and elevation information would be passed on to the Officer of the Watch for further action. |
| All photos in this table by Jerry Proc |
 |
| This was the scene on HAIDA's bridge as depicted in this photo taken in the late 1940's. Near the left side, note the rocket launcher for launching distress signals . (HMCS HAIDA Archives photo) |
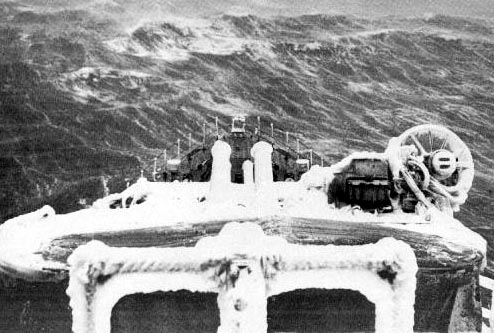 |
| This picture of cold, sullen seas and ice-encrusted guns was taken from the bridge of HMCS Haida on March 20, 1961 at the height of a storm at sea. (RCN Photo 0-13649-R taken by Lt. J.J. Drent or Lt. Dave Molliet). |
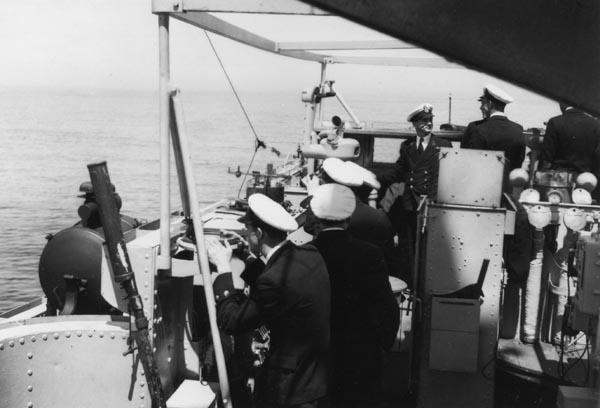
ANECDOTEDuring the Sept 1944 to Nov 1944 refit, a viewing port was added to the bridge so that the captain could view the plotting table below in the Operations Room which was then called "The Plot". It seems straight forward, however there is a story behind the story as presented by Michael Whitby of the RCN Directorate of History.
"Like the other Tribals, HAIDA had an Action Information Organization installed up according to Admiralty instructions when she returned home to Canada. This encompassed a centralized Operations Room known as The Plot and other spaces to centralize tactical information from all sources This included an improved Broadcast net. It involved quite a lot of rearranging spaces in the bridge superstructure. Harry DeWolf , HAIDA's first Captain told me that rather than coming to his home in Ottawa when HAIDA arrived back in Canada , he decided to stay in Halifax instead. There, he wanted to ensure that the new system was installed correctly since some the Tribals in the 10th Destroyer Flotilla, had elements of the system and in particular, HMS Tartar. One thing he corrected was the fitting of the View Trunk that enabled officers on the bridge to view the ARL/Tactical plot directly in the Plot. Originally the Halifax dockyard positioned the trunk so the CO viewed it while standing facing astern, This meant he had to flip everything 180 degrees in his mind. DeWolf thundered at the foreman, so the dockyard matey changed it so it was facing ahead. This is the benefit of talking directly with people"
Dec 20/25